
How To Change Squarespace 404 Page
In Squarespace web development and design, user experience is a big part of determining the success of a website. When a user clicks a broken link or tries to go to a non-existent page, they are met with the a "404 Page Not Found" error.
This error message can be frustrating and discouraging, potentially driving visitors away from your Squarespace website. However, fear not- In this blog post we will discuss Squarespace 404 page customization, exploring the best practices to enhance your site's user experience.

This is the default 404 page in Squarespace. It’s better than nothing but we can improve it. Let’s learn how to create a custom 404 page on your website!
Understanding the Importance of a Custom Squarespace 404 Page
A custom 404 page serves as a user-friendly way to inform visitors that the page they were looking for doesn't exist. Rather than presenting them with a plain, generic error message, you have the opportunity to craft a personalized and engaging page that can direct users back to relevant content, improving retention and site credibility. This is an opportunity you don’t want to miss out on.
Step-by-Step Guide to Changing Your Squarespace 404 Page
Step 1: Make a new page in Squarespace
Visit the Squarespace website and log in to your account using your username and password. Once logged in you'll be directed to the Squarespace Home Menu.
In the Home Menu, click on "Pages" to access the Pages panel. This is where you can manage all the pages on your Squarespace website.
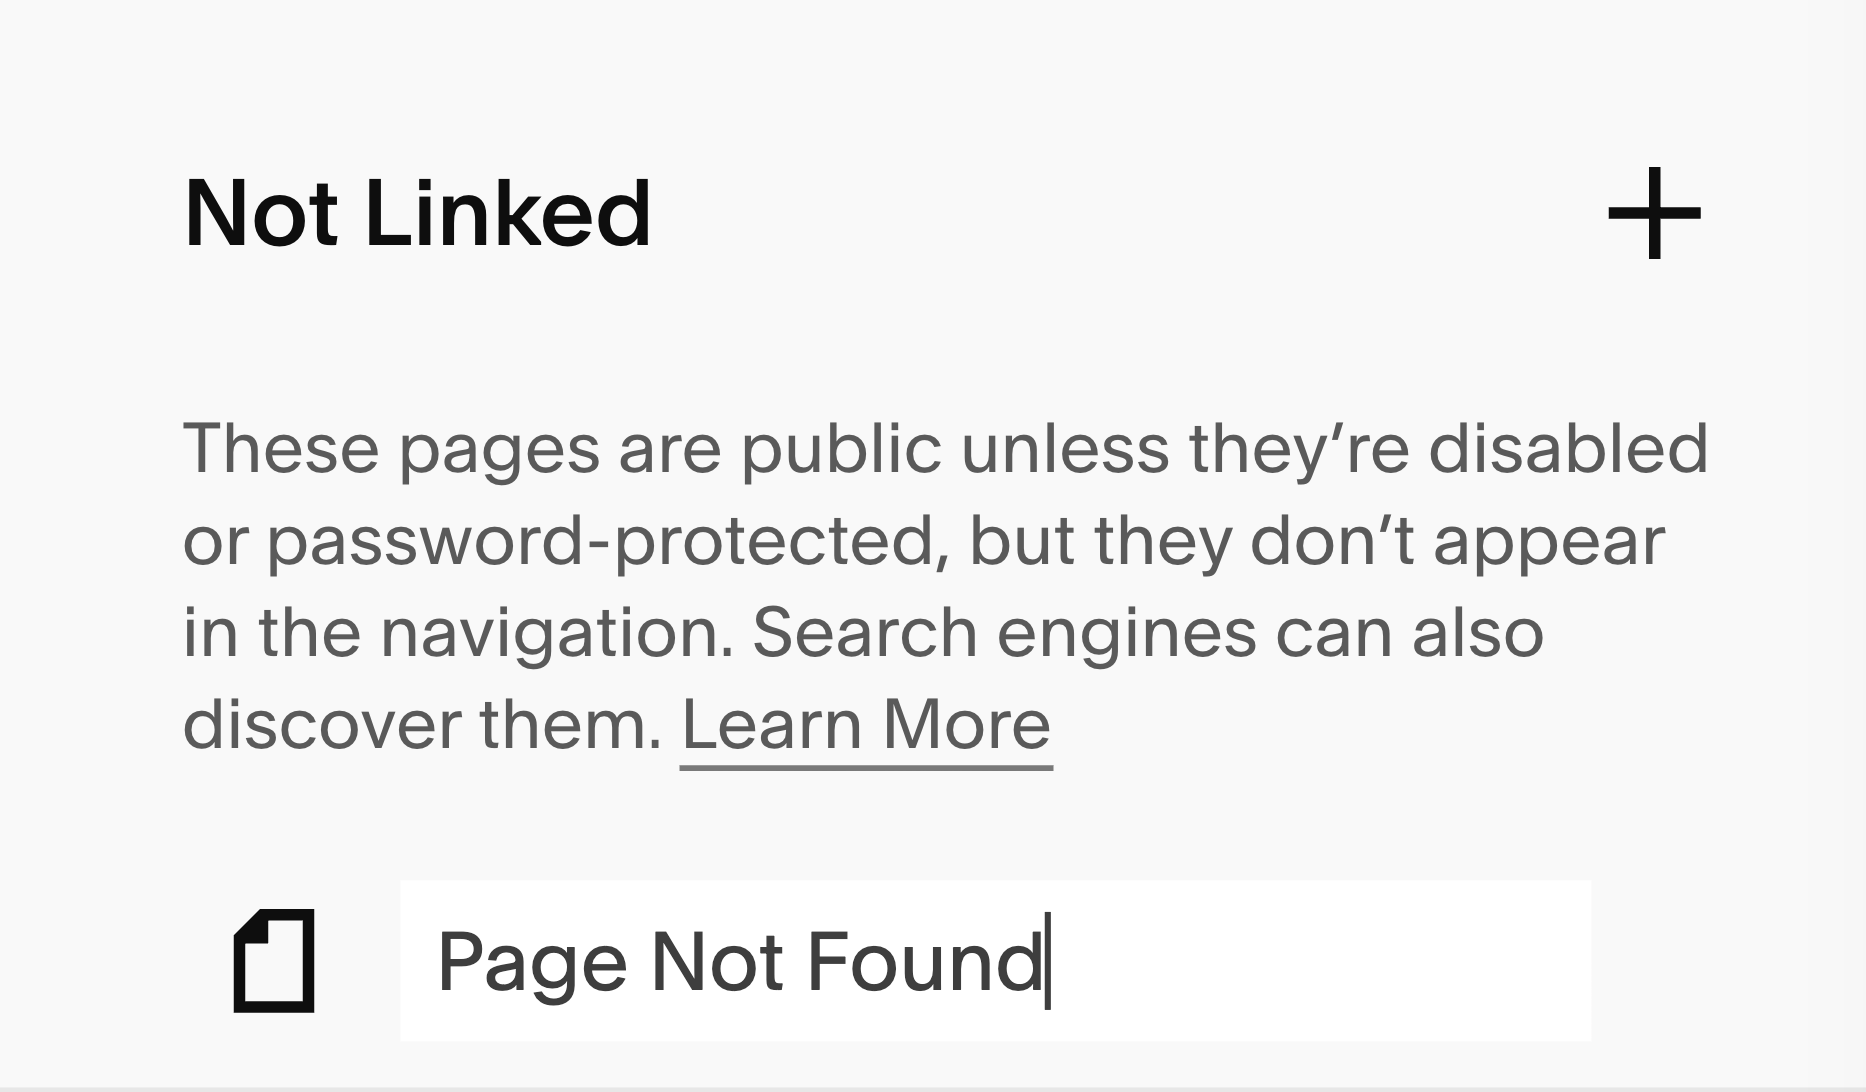
In the Pages sections, you'll see your website's existing pages listed. To add a new page, find the Not Linked section in the pages and click on the "+" symbol. A dropdown menu will appear, offering different page options. Select “Blank Page.”

Step 2: Name your Custom Squarespace 404 Page
After selecting the “Blank Page” you'll be prompted to name your new page. Choose a descriptive name that’s easy to understand. I recommend something simple like “Page not found” because this is more widely understood. Most visitors to your Squarespace site won’t know all the technical information about status codes, so something like “Error 404” may just frustrate them more and they’ll leave your site immediately.
Step 3: Designing your Squarespace 404 Page
It’s now time to design your 404 page. There are many different ways you can style this, but I recommend keeping a few aspects in mind. Your goal here should be to make the page as useful as possible for the user so they can find what they’re looking for and stay on your website. Here are my suggestions:
Add a clear title
Avoid using a title like “Error 404” or similar. Instead, use something that clearly communicates to the user what happened.
Add a subtitle
Below your title, write a better explanation and direct the user to what their next action should be. See the next step…
Add additional links and features
Here’s where you can make the most out of your 404 page. Add helpful links or actions for the user to take. Here’s some ideas:
Back to home button
This is pretty basic, but at a minimum you should make it easy for the user to go back to the homepage of your website. It’s very possible the user has never visited your website before, so sending them back to your main page to learn more about your website isn’t a bad idea.
Contact form
I really like adding a simple contact form where people can report they came across a broken link. I do this for my client websites, and set the submissions to go straight to me so I can address the issue as soon as possible.
I add a field asking what link was originally clicked so I can locate the source of the problem, and then I add a generic text box where any additional info can be entered. I recommend keeping this form as simple as possible, requiring the least amount of information to maximize submissions. Not everyone has 5 minutes to fill out a long form with tons of details.
Search bar
Adding a search bar on your 404 page can be a great way to get people to where they were trying to go.
Blog archive
If blogging is a big part of your website it may be helpful to add a summary block featuring your latest blog posts.
More ideas
If you want some more inspiration on how you could design your Squarespace error 404 page, check out these great examples of error 404 pages.


Step 4: Change the 404 page in Squarespace
Back in the main Squarespace menu, navigate to the “Design” tab and then click “404 Page.” From here you should see a drop down menu, indicating what page is used for your error 404. Click on the drop down and all your website pages should appear.
Find the page you just made and click on it. A preview of the page should pop up confirming your selection. Click “Save” in the upper left corner and you’re all done.


Congrats! You’ve successfully updated your error 404 page. Hopefully it doesn’t get used too much, but your website visitors will have a better experience now if they hit a broken link.